
Twin Twin Bench - Kitchen Door Test
Introduction:
Chris Schwarz, the Editor of Popular Woodworking and Woodworking Magazine, published a book recently titled Workbenches - From Design & Theory to Construction & Use. Chris has built and used something like 37 different types of workbenches in the past (well, ok - I guess the number is closer to a dozen), so his opinions are well respected amongst today's galoots. To assess the worthiness of any bench, Chris developed what he calls the "Kitchen Door Test" as quoted below (from this blog entry):
The Kitchen Door Test on page 9 of his book is slightly different, and it reads as follows:
Sounds reasonable, right? It's as good as any such general test aimed at cabinetmakers can be I suppose. So I thought I'd assess my bench against this test to see how it performs.
A caveat: Chris has written negative reviews of benches like mine with two twin screw vises both in his magazine and his new book, so I was quite curious to know how such a poorly thought of design would fair against his test. Here's the quote from page 37 of his book that addresses what a horribly bad choice of vises I made:
"I was talking to a guy who designs and builds custom workbenches, and he had a customer who wanted a workbench that had two twin-screw vises. One vise for the right end of the workbench that was matched to work with two long rows of dogs along the length of the benchtop. And the customer wanted the second twin-screw vise on the face of the bench that was matched to two more rows of dogs that were lined up across the width of the benchtop.
Now I'm certain that there are woodworkers who need this arrangement - perhaps someone who has to simultaneously work on a circular tabletop on one end of the bench and a Windsor chair seat at the other. And, in truth, I have seen a couple workbenches with two twin-screw vises (a quad-screw perhaps?) that made sense. But for most people who build cabinets and furniture, this setup is redundant in many ways and (as you'll see later in this chapter) neglects some functions of a bench that are critically necessary.
Making a misstep like this in designing a bench is common."
Cabinet Door:
So let's start with a door. I actually have a couple cabinet doors left over from when my house was built (my builder was good at replacing items we thought were substandard), so I tried one 17" x 22" x 3/4" and a larger one that is 22" x 34" x 3/4". Those are pretty close to the sizes his describes in the two versions of the Test. Here are the results for the smaller door:

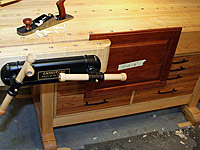
Working the long edge can be done
one of several ways depending on how much force is exerted on the edge.
If light to moderate work is needed on the edge you can just
clamp the end of the door into the right side of the face vise.
Since the twin screw does not rack (a HUGE advantage of this
vise) the door is held with surprising security against the front
apron. There's plenty of hold for tasks like scraping, trim
routing, or sanding.
If more force is used on the edge
(maybe for planing, mortising hinge gains, etc) you can clamp one end
of the board as described above, then simply add a small f-clamp to
fasten the other end of the door to the apron. This makes for
a rock solid holding of the door, so much so that no support from the
bottom is needed. So this is my first or many examples of how a nice
solid front apron is actually an advantage for clamping instead of a
disadvantage as it's described in Schwarz's tome. No funky
obtrusive sliding deadman necessary - just reach for a small clamp and
use the apron.
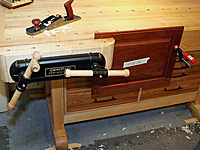
Now for working the short edge of
the door. The wide twin screw makes this a no-brainer.
Slide the door between the screws, clamp it down, and do
what's needed. The twin screw shines here.
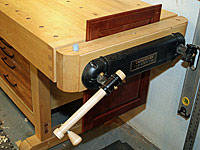
Large Cabinet Door:
The larger of the two doors was up next. Remember, this one
is 22" x 34" x 3/4" - sized for a typical wall
cabinet.
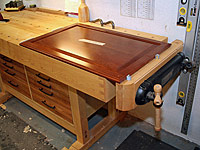
Working the face is
once again a piece of cake thanks to the end twin screw and the rows of
dog holes.
The story is much the
same for the long edges, except a clamp is definately needed on the far
end since this door is fairly heavy.
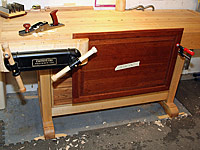
Working
the 22" end is the same technique. The non-racking twin screw
and the handy dandy apron make this easy peasy:
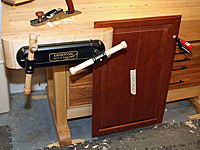
In fact, check this
out. Look Ma, no racking!
Molding Stock:
Next was the baseboard stock he referenced. This of course could represent working with any relatively long board for all sorts of cabinetry. I scoured my scrap stock and found a board about the same size he recommened - 5"x48"x3/4". It was actually 52" long for a few of these pics, then I cut it down to 48" when I realized his recommended board was a bit shorter.
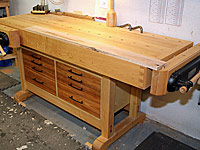
Working the long edge (52" here) showcases one of the strengths of the twin screw in the face position. Since the vise jaw is relatively wide, and since there are two non-racking screws to provide a lot of force to the board, you can securely clamp very wide stock without the need for additional support from below. This 52" wide board is no problem. Edge joint, cut/scrape molding, whatever - it won't slip in the jaws. When I built the bench I considered lining the moveable jaw with leather to make it a bit more grippy, but once I started using the bench I found no need for additional traction.
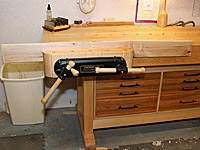
And finally let's work the end grain. The top of my bench is something like 34.5" off the floor, so a board like this when clamped as low as possible in the front vise puts the top about 13.5" higher than the bench top. It's workable but certainly not perfect. You could still cut tenons or dovetails or plane the end grain, but it is a tad high. I'm not sure what other type of bench would be better for this unless it was very tall or there was a pit below the vise to slide the board into. ;-) You could also clamp the board in the vise in the same manner but tilt it off plum so that you can get a good veiw while cutting a tenon, and this would reduce the height concern as well.
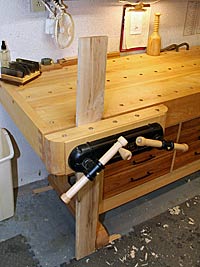
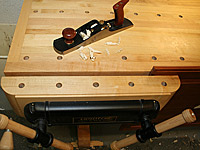
So a more reasonable approach to working the end of the board - especially if it gets much longer - is to work it flat on the top of the bench. That eliminate the problems with height, and at the same time it provides more control for sawing tenon shoulders or for planing given the use of a shooting board like this:
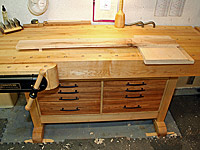
Drawer:
And finally, here is a drawer that was close at hand (it's from my bench base cabinet), and at 21" x 18" x 3.5" it's sized close to his test subject. It was a good test because the front is an "overlay" or "false' front that's applied over the smaller front board of the drawer box. This creates a lip on the top and bottom and ends (to conceal the slides) that makes clamping a bit more challenging than a simple box.
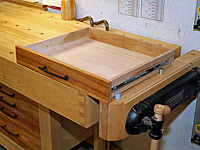
The back end of the drawer is easy as well. Take advantage of the non-racking right end of the front vise and apply a f-clamp to the handy front apron for a very secure grip. There's no need for support from below here - even for such demanding tasks as planing/sanding the end grain of the side pieces.
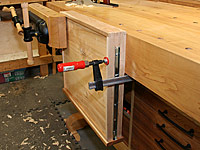
So let's work the box sides. The applied front makes it more challenging than a normal 4-board box, but it's still easily surmountable. Here I would use the twin screw in the end position to grip the bottom lip of the applied front (as shown in the detail). Then add a clamp to that friendly apron.
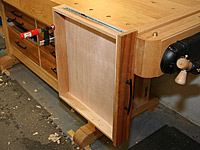
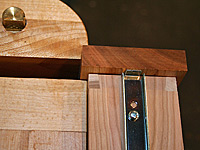
Last comes the working on the applied face. The overhanging lip on the front board acts to our advantage here. Just lay the bottom of the drawer face flat on the bench top and slide the drawer side in the front vise. Clamp down on the front vise, and the lip on the top provides natural support for the rest of the piece (as shown on the left pic below). For wider drawers you could even use a clamp to fasten to that helpful front apron (as shown on the right below).
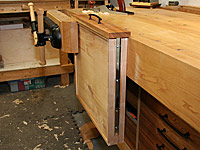
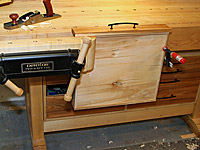
So let's look at an alternate method I sometimes use to work the face, sides, and/or back. For this technique I use holdfasts to clamp a scrap board to the top of the bench so that it overhangs the front edge. Then slide the box over the overhanging board and use the face vise to secure the left edge. The scrap board provides ample support for working the 4 box sides and the front vise just keeps the box from sliding around as you work. This technique is a bit more involved but it is works very well especially when you're working a number of drawers in succession.
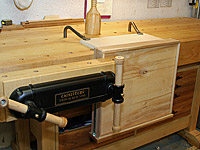
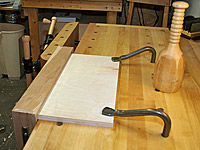
(Oh yeah, note that I have a bank of drawers in my bench base, but if you design the bench carefully you can still end up with plenty of room under the top for holdfasts.)
Summary/Conclusions:
Well, overall I think the bench does very well. It was able to securely clamp each of the test pieces in each of the orientations.
The holdfasts, bench dogs, and f-clamp are standard bench accessories that provide a ton of versatility. I've heard people scoff at benches with multipe rows of dog holes running the length of the top, but I'd never want to be without them. The holdfasts (probably my most used accessory) are quick and effective for securing pieces to the top of the bench. And if one has some sort of philosophical problem with using a clamp with the apron then it would be a simple task to drill a few holes along it's length so that a holdfast and/or dogs could be used instead.
The Veritas Twin Screw vises live up to their billing. The fact that they don't rack makes them uniquely qualified to clamp with their edges without the need for clunky vise blocks. Holding boards upright between the screws is simply a joy for working the ends (think dovetailing). The twin screw at the end works great for holding wide boards upright between the jaws, there's no better vise for clamping down panels flat to the top, and it's a fine replacement for a typical end or tail vise. And they're even awesome for edge jointing since they easily hold long boards.
What can I say about the apron other than I don't think I'd want to work without it. Instead of being a hinderance to clamping, I find it to be an invaluable aid for securing wide pieces. And it's ridiculous to say the apron gets in the way of clamping boards to the top of the bench for a couple reasons: first if you have versatile vises and suitable holdfasts you shouldn't need to clamp to the top all that often, and second check out this picture.
And don't believe the hype about avoiding cabinets in the base of your bench. They're perfect for storing all the tools you need to have right at hand while working on your bench, they add lots of mass, and if they fit tightly in the base they even provide additional structural stability to resist the base racking as you plane. Just be SURE to provide ample clearance under the bench top for holdfasts, and keep the drawer fronts recessed back from the plane of the front apron so they don't get in the way of clamping.
And by the way, I have not run in to a single instance where I've felt the need to have the legs of my bench in the same plane as the front of the benchtop. Not that this would be a bad thing, but I don't think it's mandatory either given a carefully designed bench. I suppose if I were planing a very long and very wide door (like and entry door or a pantry door) I could use the extra support from below, but I simply haven't needed that yet, and if/when I do there are other simple ways to provide temporary support from the bottom.
So I think my bench does pretty well. No matter what that new book says. :-)
Postscript:
I think Chris' book, magazine, and blog writings about workbench design theory are generally superb. If you're considering building a bench I'd highly recommend reading his book along with a few other classics that I found valuable (Schleining and Landis also wrote great bench books). I've met Chris, sat next to him at a group dinner with our local woodworking club, and I've exchanged a few emails on these topics. I have no personal beef with him; in fact I find his humour and writing style to be right up my alley. But I do think he's off base on a few of the things he purports about bench design, and I hoped to use my bench as an example of some of these humble criticisms. I'm not trying to say my bench is the best thing in the world, and I realize it's not for everyone (hell, I'd change a few things if I were to do it over again). Just as I don't see the world in black and white, I also don't think it's fair to blatantly dismiss things like aprons, two twin screws, base cabinets, and legs that aren't flush with the top. I just wish I could write as well as Chris so that my opinions came across with as much eloquence, vim, and vigor.
And I should thank Chris for making me think more critically about how benches are designed and used, and for generally raising the knowledge base of woodworkers on old school hand tools of all sorts.
© Copyright 2008 Chris Billman