New & Improved Shop Benches (2009)
I'd been using a set of utility benches (link) for 14 years that served me extremely well, but the time had finally come to improve upon their storage and efficiency. Here's a composite picture (since it's a made of several separate pics that have been pieced together it's a bit skewed):

I wanted to accomplish/incorporate a number of things with these benches:
- Reuse as much of the material from my old benches as possible. I was able to keep just about everything out of the landfill in the end - using the melamine for the top and bottom surfaces and using the 2x4's for other utility construction lumber.
- Maximize the space available. These go from a non-movable pole on the left to the far wall of the house on the right. Every inch available has been used.
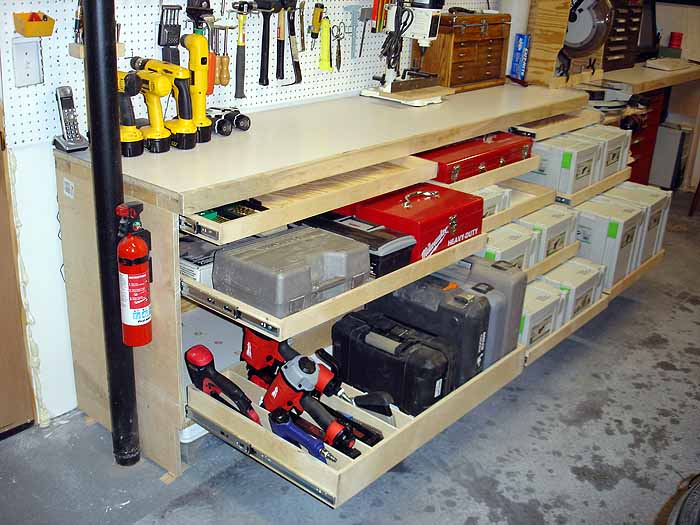
- Maximize the storage available within the benches. So I packed almost every cubic inch with drawers on full extension slides. I can't believe how much stuff I have stuffed in this bench, and to my amazement I ended up with leftover drawer space that's unoccupied (for now). I even have storage boxes built into the toe-kick spaces.
- Incorporate my toolboxes to free up the floorspace they were occupying for other things. I sized the right side bench around the toolbox base cabinets. They fit nicely down there, and the shallower cabinet (that was the side unit on the base) makes a nice recess for my legs while sitting on the stool working on the PC above it.
- Incorporate my miter saw and keep the benchtops level and coplanar with the saw table. My old bench was never leveled perfectly, but for these benches I borrowed an auto-leveling laser that shot a beam all around the room. I shimmed the bottom of the new benches such that the tops were all nicely level (side to side and front to back) with the laser beam.
- Use a surface material that is more durable than the melamine I used previously but keep it light. So I used white formica that I glued over the old melamine (after sanding the old melamine top surface).
Here are a few more pics that have not been distorted by the compositing feature I mentioned in the picture above:


I had planned to cover the drawerfronts on the left side cabinet in my original plans. But once I got everything assembled I liked having a visual look at the contents of each of the drawers. So I decided to live with the bench like this for a while to see if I wanted to cover the drawerfronts or not after some use. I'm a bit concerned about sawdust getting into the drawers, but that may end up being a minor issue compared with the benefits of having them open and visible. Time will tell....
© Copyright 2009 Chris Billman